
Ah, the sweet smell of automation — the satisfaction that comes when you realize that pushing code to production could finally be as easy as…well, pushing a button. But if you’ve ever tried setting up CI/CD for iOS apps, you know it’s more like wrangling a very cranky, very complicated robot. In this guide, I’ll show you how I set up a Continuous Integration and Continuous Deployment (CI/CD) pipeline for a Flutter iOS app using GitHub Actions, and — just maybe — we’ll have some fun along the way.
Spoiler alert: You may experience joy once it works. Or at least relief.
The Problem: “Why Does iOS Hate Me?”
If you’ve worked with Flutter, you know it has this magical ability to build apps for multiple platforms. Then you look at iOS and it’s like, “Hey, you need certificates, profiles, keys, provisioning…and by the way, you’ll probably need a Mac, too.”
Oh, joy.
But fear not! I’ve already gone through the headaches so you don’t have to. Just follow along as we set up this neat GitHub Actions workflow to build and release your Flutter app for iOS. Trust me, we’re getting this app onto your iPhone!
Generating and Managing Keys Like a Pro
Before we even get to the juicy bits of automation, we need to prepare a few critical ingredients: certificates, provisioning profiles, and App Store Connect API keys. Let’s break down how to get each one.
1. Apple Developer Certificate (.p12)
This is the certificate that allows you to sign your app and deploy it to real iOS devices.
- Export the Certificate as .p12:
- Open Keychain Access again, find your new certificate under My Certificates.
- Right-click the certificate, and select Export.
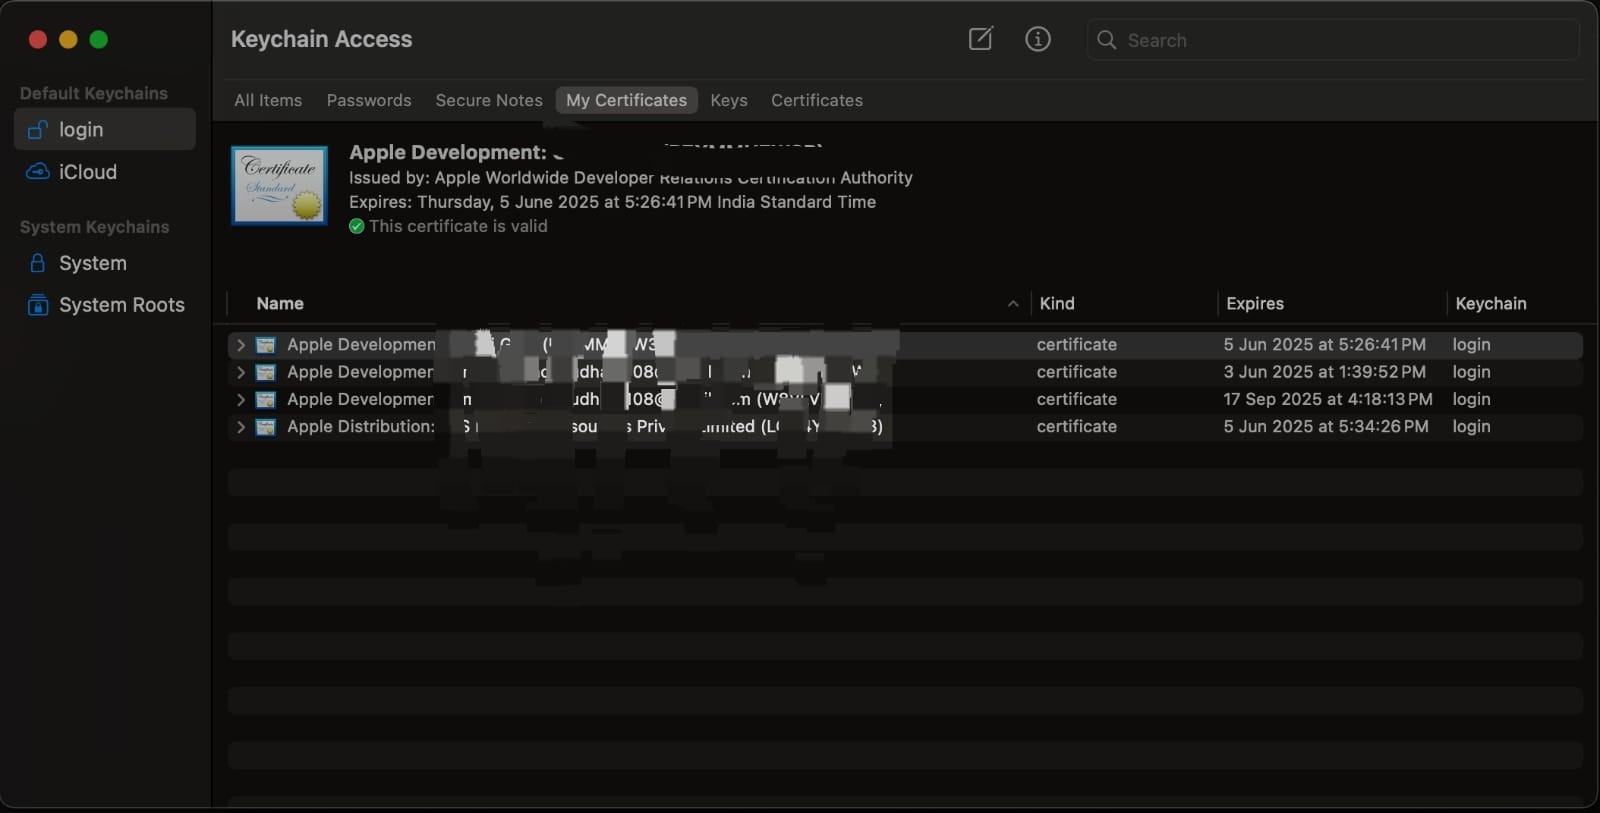
- Save it as a
.p12file and set a password(this password will be used, lets call itP12_PASSWORD) - If you don’t find the certificate you can download the certificate from https://developer.apple.com/account/resources/certificates/list or you can create one specific for github action.
2. Store the .p12 in GitHub Secrets:
- Base64 encode the
.p12file:
base64 -i my_certificate.p12 | pbcopy
- Store the encoded string in
BUILD_CERTIFICATE_BASE64in your GitHub repository's Secrets. - Store the
.p12password inP12_PASSWORD.
2. Provisioning Profile (.mobileprovision)
A provisioning profile is what links your certificate to your app and the devices you’re allowed to install it on.
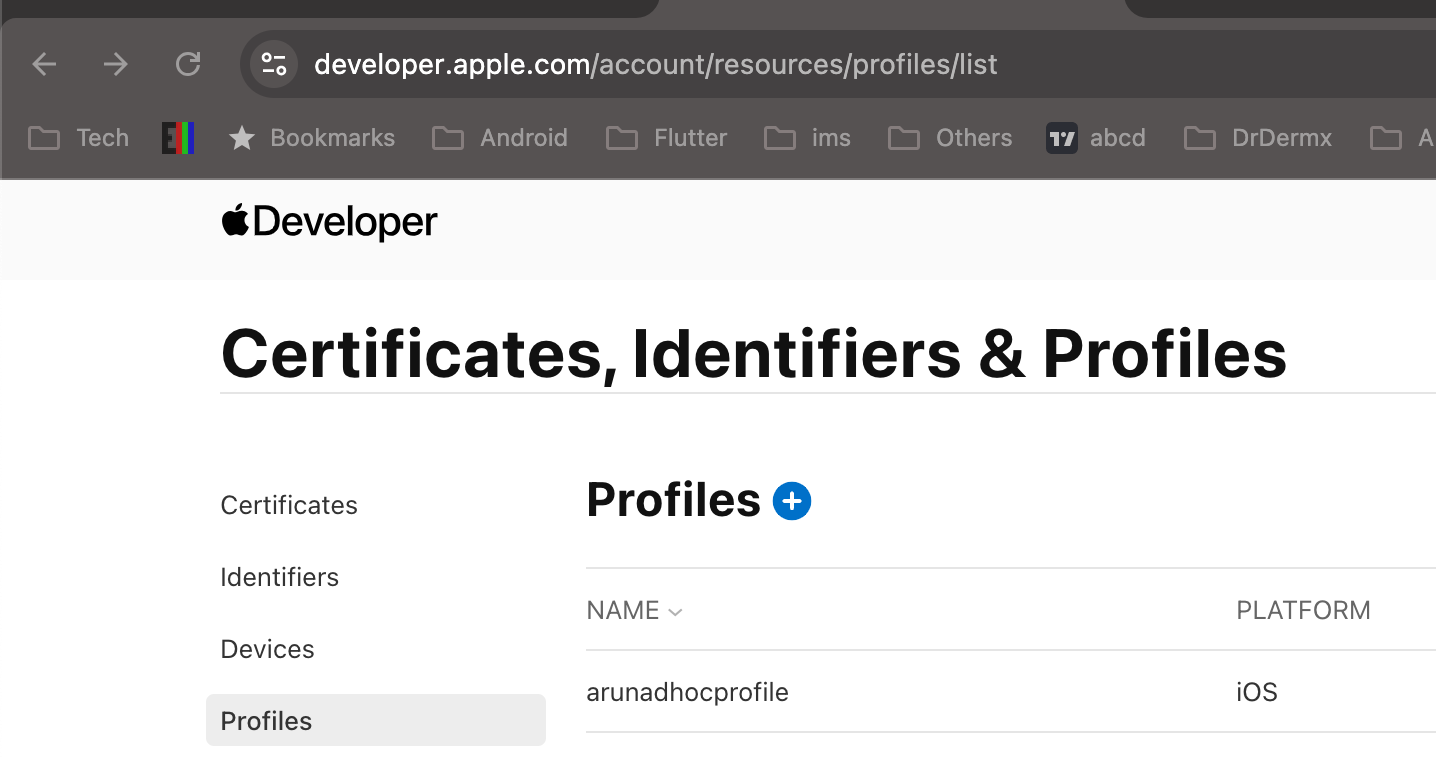
- Create a Provisioning Profile(Online) :
- Go to Apple Developer > Profiles > +.
- Select iOS App Development or App Store for distribution.
- Choose the App ID, select your certificate, and add any devices (for development profiles).
- Download the resulting
.mobileprovisionfile.
2. Create a Provisioning Profile(Offline) :
by this time you must be having provisioing profile its just that you never needed, because xcode handle automatic signing( if Automatically manage signing is checked) for you and it must have downloaded the profile. So you can generate locally by going to account setting of xcode click the team and click download manual profile:
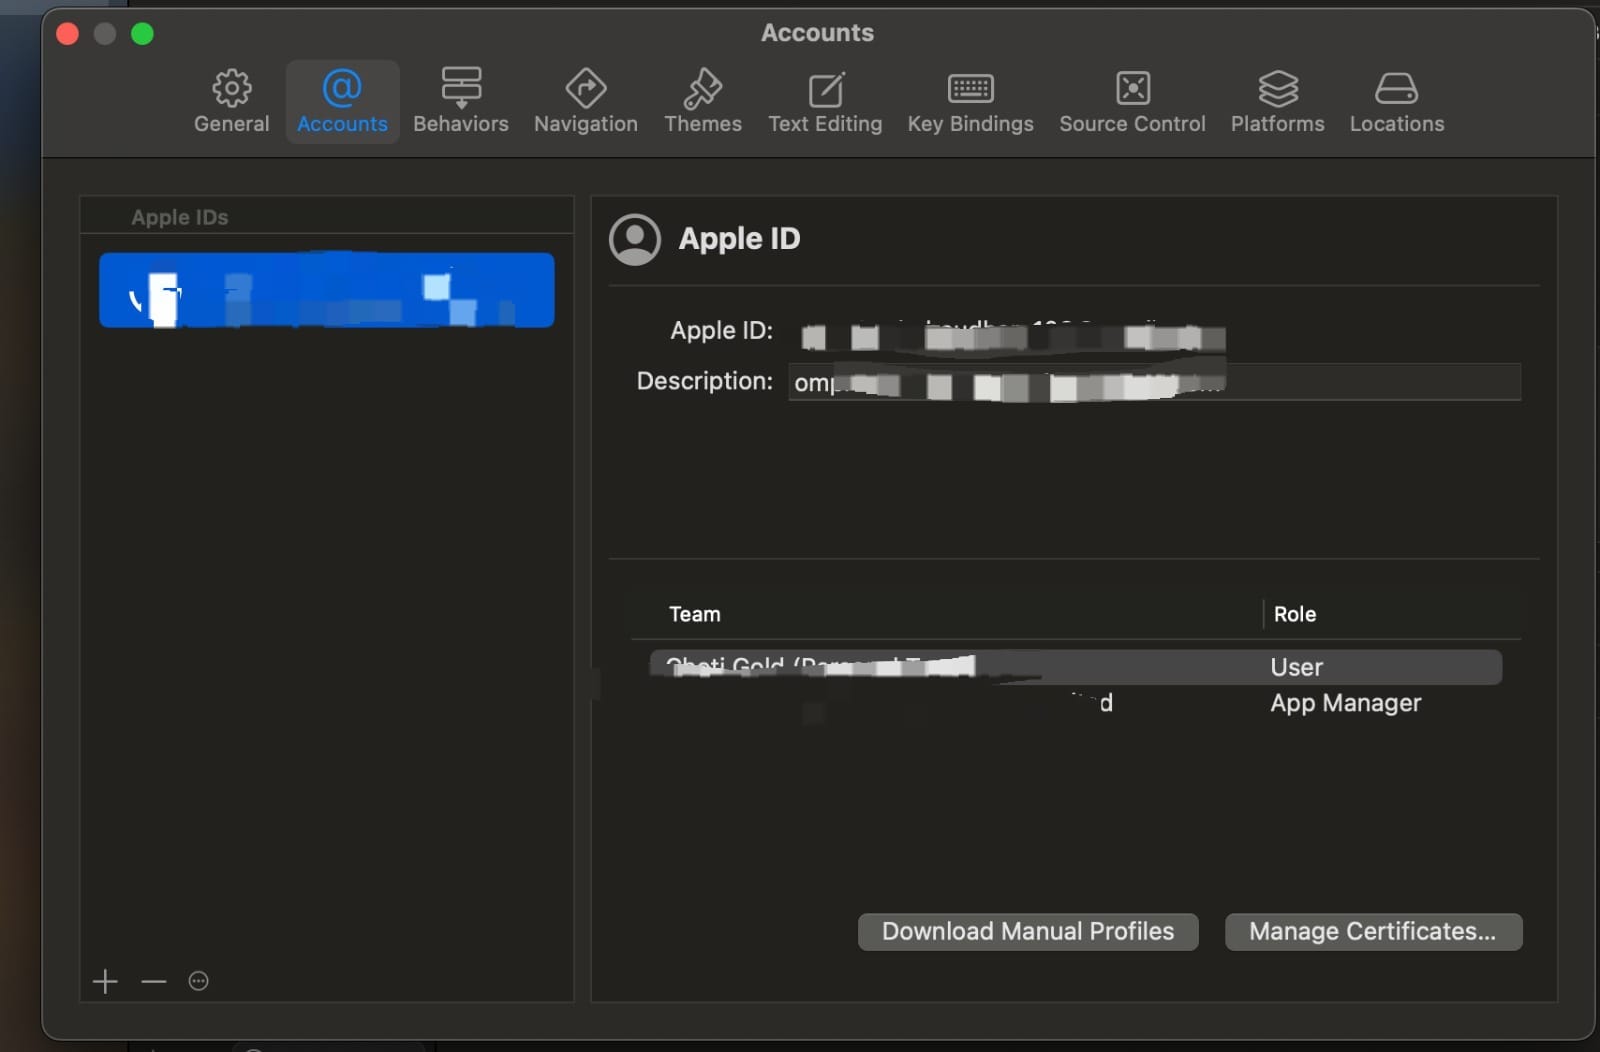
#this will download the profiles into
Users/<user>/Library/MobileDevice/Provisioning Profiles
you can open this profile and can check the profile name to know which one to use.
3. Store the Provisioning Profile in GitHub Secrets:
Base64 encode the .mobileprovision file:
base64 -i my_provisioning_profile.mobileprovision | pbcopy
Store the encoded string in MOBILEPROVISION_BASE64 in your GitHub repository's Secrets.
3. App Store Connect API Key (AuthKey.p8)
For automating uploads to App Store Connect, you’ll need an API key.
- Generate an API Key:
- Go to App Store Connect and click Keys in the Users and Access section.
- Click the + button to generate a new API key, give it a name, and choose the App Manager role.
- Download the
.p8key file and note the Issuer ID and Key ID. You’ll need all three to authenticate.
- Store the API Key in GitHub Secrets:
- Base64 encode the
.p8file:
base64 -i AuthKey_KEYID.p8 | pbcopy
- Store the encoded string in
APP_STORE_CONNECT_API_KEYin your GitHub Secrets. - Store the Issuer ID in
ISSUER_ID. - Store the Key ID in
KEY_ID.
4. Storing secrets in githhub secrets :
- Go to your GitHub repository, and navigate to Settings > Secrets > Actions.
- Add the following secrets:
BUILD_CERTIFICATE_BASE64P12_PASSWORDMOBILEPROVISION_BASE64APP_STORE_CONNECT_API_KEYISSUER_IDKEY_IDKEYCHAIN_PASSWORD(used for creating a temporary keychain in the workflow, give any password)GITHUB_TOKEN(automatically created by GitHub Actions, but still good to know)
With all these steps, you’ve secured all the necessary keys and secrets for building, signing, and deploying your Flutter iOS app with GitHub Actions. You can now rest easy knowing your app is in good hands (your own!).
Generating ExportOptions.plist (The Magic Wand for iOS Builds)
Believe me this is the first thing you need ,ok second thing first thing was storing all certificate and profiles and api keys..blah blah, trust me :)
The ExportOptions.plist file is essential for defining the export method (development, ad-hoc, app store, etc.) when generating signed .ipa file. Here’s how you can generate and configure it.
1. Generate ExportOptions.plist Using Xcode
- Archive the App:
- Open your Flutter project in Xcode.
- Uncheck the Automatically manage signing from xcode and import recently downloaded profile from apple developer account.
- Select your iOS target (usually
Runner), and then choose Product > Archive from the menu. - Wait for the archive to finish.
3. Export the Archive:
- Once the archive is complete, the Organizer window will open. Click Distribute App.
- Select custom option for distribution
- Select the desired export method (Development, Ad-Hoc, App Store, or Enterprise).
- Choose Manual Signing and select your provisioning profile.
- Continue through the steps until you reach the Summary page, where you can see an option to export , this will export a folder which contains the ExportOptions.plist
- Export the
.plistfile and save it to a safe location. This file will be specific to the type of distribution you selected.
Note — When you archive build using manual profile, ios/Runner.xcodeproj/project.pbxproj get some changes related to manual profile
CODE_SIGN_STYLE = Manual
"PROVISIONING_PROFILE_SPECIFIER[sdk=iphoneos*]" = appstore_prod;(profile_name)
These changes needs to be pushed before running this github action so that when we build ios app, xcode will know which profile to use.
2. Customize ExportOptions.plist (Optional)
You can open and edit the ExportOptions.plist file in any text editor. For example, here’s a simple template for App Store distribution:
<?xml version="1.0" encoding="UTF-8"?>
<!DOCTYPE plist PUBLIC "-//Apple//DTD PLIST 1.0//EN" "http://www.apple.com/DTDs/PropertyList-1.0.dtd">
<plist version="1.0">
<dict>
<key>compileBitcode</key>
<true/>
<key>destination</key>
<string>export</string>
<key>method</key>
<string>app-store-connect</string>
<key>provisioningProfiles</key>
<dict>
<key>com.yourcompany.appname</key>
<string>YourProvisioningProfileName</string>
</dict>
<key>signingCertificate</key>
<string>ADADFDFDSFDFSDFSFFDFFFF</string>
<key>signingStyle</key>
<string>manual</string>
<key>stripSwiftSymbols</key>
<true/>
<key>teamID</key>
<string>YourTeamID</string>
</dict>
</plist>
3. Copy ExportOptions.plist to the ios/Runner Directory
Once you’ve generated or customized your ExportOptions.plist, you’ll need to ensure it’s included in your repository at the correct location (ios/Runner/).
4. Use ExportOptions.plist in Your Build
Once the ExportOptions.plist is in place, you can use below command to build ios locally from your project root dir :
flutter build ipa -t lib/main_prod.dart --export-options-plist=ios/Runner/ExportOptions.plist
if you reached till this point by resolving all issue that you might have faced , you have won almost half battle.
Now all you need is just copy paste the below yaml and you are good to go.
Note- You can remove -t lib/main_prod.dart from above command if you do not have more than one scheme in xcode.
Step 1: Checking Out the Code (But Not Literally)
name: flutter CI IOS
on:
workflow_dispatch:
jobs:
build:
runs-on: macos-15 # Use macOS for iOS builds
steps:
# Checkout the code
- name: Checkout code
uses: actions/checkout@v3
with:
ref: <your-working-branch>
Pretty straightforward — this action gets your code from GitHub so the magic can begin. Kind of like the moment a chef gets their ingredients. Except this chef is about to burn the kitchen down if they don’t handle iOS certificates properly…
Step 2: Installing the Apple Certificate and Provisioning Profile (a.k.a. Sorcery)
- name: Install the Apple certificate and provisioning profile
env:
BUILD_CERTIFICATE_BASE64: ${{ secrets.BUILD_CERTIFICATE_BASE64 }}
P12_PASSWORD: ${{ secrets.P12_PASSWORD }}
BUILD_PROVISION_PROFILE_BASE64: ${{ secrets.MOBILEPROVISION_BASE64 }}
KEYCHAIN_PASSWORD: ${{ secrets.KEYCHAIN_PASSWORD }}
run: |
CERTIFICATE_PATH=$RUNNER_TEMP/build_certificate.p12
PP_PATH=$RUNNER_TEMP/build_pp.mobileprovision
KEYCHAIN_PATH=$RUNNER_TEMP/app-signing.keychain-db
echo -n "$BUILD_CERTIFICATE_BASE64" | base64 --decode --output $CERTIFICATE_PATH
echo -n "$BUILD_PROVISION_PROFILE_BASE64" | base64 --decode --output $PP_PATH
security create-keychain -p "$KEYCHAIN_PASSWORD" $KEYCHAIN_PATH
security set-keychain-settings -lut 21600 $KEYCHAIN_PATH
security unlock-keychain -p "$KEYCHAIN_PASSWORD" $KEYCHAIN_PATH
security import $CERTIFICATE_PATH -P "$P12_PASSWORD" -A -t cert -f pkcs12 -k $KEYCHAIN_PATH
security list-keychain -d user -s $KEYCHAIN_PATH
mkdir -p ~/Library/MobileDevice/Provisioning\ Profiles
cp $PP_PATH ~/Library/MobileDevice/Provisioning\ Profiles
This is where the real fun begins. You get to install Apple certificates and provisioning profiles with enough security layers to make Fort Knox jealous. Using Base64 encoding, we pass around secrets like we’re spies in a Cold War movie. 🕵️♂️
Just remember to put your certificates in the GitHub Secrets section. No one wants to be that person who commits a private key to GitHub.
Step 3: Flutter Action (Not Like a Hollywood Action Movie)
- uses: subosito/flutter-action@v1
with:
channel: 'stable'
flutter-version: '3.29.2'
# Get Flutter dependencies
- run: flutter pub get
Now we bring in the star of the show — Flutter! This handy action installs the right version of Flutter for our pipeline. Think of it like your personal assistant who has already brewed the coffee, made breakfast, and set the table for you.
Step 4: Endpoint Shenanigans
Note- if you don’t have more than one env you can skip this.
- name: Copy staging endpoints
run: cp lib/repositories/endpoints_prod.dart lib/repositories/endpoints.dart
Ah, environments — staging and production. One minute you’re happily working in dev, and the next, your staging environment decides to act like an unruly teenager. So, here we’re copying environment-specific files before the build to ensure everything’s on track.
Staging endpoints are basically the “I’m not really dressed yet, but I’m presentable enough to go to the store” version of production.
Step 5: Auto-Increment iOS Build Number
This step will increase ios build number so you don’t get build upload failure.
- name: Auto-Increment iOS Build Number
run: |
cd ios
agvtool next-version -all
echo "New Build Number: $(agvtool what-version -terse)"
cd ..
Step 6: Building for iOS (aka, The Fun Part)
- name: Build iOS staging
run: flutter build ipa -t lib/main_prod.dart --export-options-plist=ios/Runner/ExportOptions.plist
Now we get to the main event — building the iOS app! This command spins Flutter’s magic and out pops your .ipa file. You’ll run this for both staging and production, because obviously, they’re not the same. (Note: Don’t ship your staging app to the App Store unless you want a lot of explaining to do.)
Step 6: Upload Your App to App Store Connect, Like a Boss
- name: Upload IPA to App Store Connect
env:
APP_STORE_CONNECT_API_KEY: ${{ secrets.APP_STORE_CONNECT_API_KEY }}
ISSUER_ID: ${{ secrets.ISSUER_ID }}
KEY_ID: ${{ secrets.KEY_ID }}
run: |
mkdir -p ~/.appstoreconnect/private_keys
echo -n "$APP_STORE_CONNECT_API_KEY" | base64 --decode --output ~/.appstoreconnect/private_keys/AuthKey_${KEY_ID}.p8
xcrun altool --upload-app --type ios \
--file build/ios/ipa/prod_runner.ipa \
--apiKey $KEY_ID --apiIssuer $ISSUER_ID \
--output-format xml
Time to upload that shiny new .ipa to App Store Connect. We’ll need some secrets for that (yep, more secrets). Once the command is done, your app is on its way to Apple’s servers—assuming Apple hasn’t decided to have an unscheduled outage, of course.
Once this part is done, you can see the new app in testflight.
Note — Check your ipa name, it should be app name. So check in this location “build/ios/ipa/<>.ipa” by running ipa build command
(flutter build ipa -t lib/main_prod.dart — export-options-plist=ios/Runner/ExportOptions.plist)
Step 8: Clean Up Like You Were Never There
- name: Clean up keychain and provisioning profile
if: ${{ always() }}
run: |
security delete-keychain $RUNNER_TEMP/app-signing.keychain-db
rm ~/Library/MobileDevice/Provisioning\ Profiles/build_pp.mobileprovision
Just like a great party, you’ve got to clean up afterward. Remove the certificates, delete the keychain, and pretend like the whole provisioning process never happened. 🍸
Step 9: Push the build number changes back to branch
- name: Push the build number changes
run: |
git config --global user.name "GitHub Actions"
git config --global user.email "actions@github.com"
git add ios/Runner/Info.plist
git add ios/Runner.xcodeproj/project.pbxproj
git commit -m "Auto-increment iOS build number"
git push origin <your-working-branch>
Here is the full yaml file :
name: flutter CI IOS Prod
on:
workflow_dispatch:
jobs:
build:
runs-on: macos-15 # Use macOS for iOS builds
steps:
# Checkout the code
- name: Checkout code
uses: actions/checkout@v3
with:
ref: main
# Install the Apple certificate and provisioning profile
- name: Install the Apple certificate and provisioning profile
env:
BUILD_CERTIFICATE_BASE64: ${{ secrets.BUILD_CERTIFICATE_BASE64_STAGING }}
P12_PASSWORD: ${{ secrets.P12_PASSWORD_STAGING }}
BUILD_PROVISION_PROFILE_BASE64: ${{ secrets.MOBILEPROVISION_BASE64 }}
KEYCHAIN_PASSWORD: ${{ secrets.KEYCHAIN_PASSWORD }}
run: |
# create variables
CERTIFICATE_PATH=$RUNNER_TEMP/build_certificate.p12
PP_PATH=$RUNNER_TEMP/adhoc_op.mobileprovision
KEYCHAIN_PATH=$RUNNER_TEMP/app-signing.keychain-db
# import certificate and provisioning profile from secrets
echo -n "$BUILD_CERTIFICATE_BASE64" | base64 --decode --output $CERTIFICATE_PATH
echo -n "$BUILD_PROVISION_PROFILE_BASE64" | base64 --decode --output $PP_PATH
# create temporary keychain
security create-keychain -p "$KEYCHAIN_PASSWORD" $KEYCHAIN_PATH
security set-keychain-settings -lut 21600 $KEYCHAIN_PATH
security unlock-keychain -p "$KEYCHAIN_PASSWORD" $KEYCHAIN_PATH
# import certificate to keychain
security import $CERTIFICATE_PATH -P "$P12_PASSWORD" -A -t cert -f pkcs12 -k $KEYCHAIN_PATH
security list-keychain -d user -s $KEYCHAIN_PATH
# apply provisioning profile
mkdir -p ~/Library/MobileDevice/Provisioning\ Profiles
cp $PP_PATH ~/Library/MobileDevice/Provisioning\ Profiles
# Setup the Flutter environment
- uses: subosito/flutter-action@v1
with:
channel: 'stable'
flutter-version: '3.29.2'
# Get Flutter dependencies
- run: flutter pub get
- name: Copy production endpoints
run: cp lib/repositories/endpoints_prod.dart lib/repositories/endpoints.dart
- name: Auto-Increment iOS Build Number
run: |
cd ios
agvtool next-version -all
echo "New Build Number: $(agvtool what-version -terse)"
cd ..
# # iOS build for production
# - name: Build iOS
# run: flutter build ios --flavor staging -t lib/main_staging.dart
# iOS build for production
- name: Build ipa production
run: flutter build ipa --flavor prod -t lib/main_prod.dart --export-options-plist=ios/ExportOptions_prod.plist
- name: Upload IPA to App Store Connect
env:
APP_STORE_CONNECT_API_KEY: ${{ secrets.APP_STORE_CONNECT_API_KEY }}
ISSUER_ID: ${{ secrets.ISSUER_ID }}
KEY_ID: ${{ secrets.KEY_ID }}
run: |
# Create the necessary directory structure if it doesn't exist
mkdir -p ~/.appstoreconnect/private_keys
# Save App Store Connect API key to the specified location
echo -n "$APP_STORE_CONNECT_API_KEY" | base64 --decode --output ~/.appstoreconnect/private_keys/AuthKey_${KEY_ID}.p8
# Upload IPA to App Store Connect
xcrun altool --upload-app --type ios \
--file build/ios/ipa/runner.ipa \
--apiKey $KEY_ID --apiIssuer $ISSUER_ID \
--output-format xml --verbose
# Important! Cleanup: remove the certificate and provisioning profile from the runner!
- name: Clean up keychain and provisioning profile
if: ${{ always() }}
run: |
security delete-keychain $RUNNER_TEMP/app-signing.keychain-db
rm ~/Library/MobileDevice/Provisioning\ Profiles/adhoc_op.mobileprovision
- name: Push the build number changes
run: |
git config --global user.name "GitHub Actions"
git config --global user.email "actions@github.com"
git add ios/Runner/Info.plist
git add ios/Runner.xcodeproj/project.pbxproj
git commit -m "Auto-increment iOS build number"
git push origin main
Conclusion: The Sweet Smell of Automation
Congratulations, you’ve just set up a full CI/CD pipeline for Flutter iOS apps using GitHub Actions!
It’s not every day you wrangle iOS signing, provisioning, and uploading, after all.
And remember, the next time someone asks if you’ve set up a CI/CD pipeline for iOS, just smile and say, “Yeah, it was easy.”